A built-in media wall isn’t just about creating a gorgeous focal point for your living room — it’s a careful marriage of design and engineering. In high-end homes across Dallas–Fort Worth, these features are becoming the modern equivalent of a fireplace: a centerpiece for gathering, entertainment, and aesthetic impact.
But here’s the catch: without proper planning for power access, ventilation, and depth, your dream media wall can turn into a nightmare of overheating components, unsightly wires, or awkward proportions.
Let’s walk through the essentials.
Power Access: More Than Just an Outlet
While most people think, “I’ll just plug in the TV”, a luxury media wall demands far more:
- Multiple Power Sources – Your setup may require dedicated outlets for the TV, soundbar, receiver, streaming devices, gaming consoles, and accent lighting.
- Strategic Placement – Outlets should be hidden but accessible, often placed directly behind the TV mount and in concealed storage compartments for components.
- Cable Management Channels – Built-in conduits or raceways keep wires invisible and maintenance-friendly.
- Low-Voltage Integration – Plan for Ethernet ports, HDMI pass-throughs, and smart home hubs to minimize wireless lag and ensure signal reliability.
Dallas Tip: In many newer DFW homes, the builder’s original wall outlets aren’t aligned for custom media centers. We often reframe and rewire to place them exactly where the design calls for.
Ventilation: Protecting Your Investment
Electronics generate heat — and heat is the silent killer of performance and lifespan. Luxury cabinetry demands a discreet but effective cooling strategy:
- Passive Ventilation – Cutouts in the back panels or base kickplates allow airflow without interrupting the design.
- Active Cooling – Low-noise fans can be installed in enclosed cabinets to draw out warm air from AV receivers and gaming consoles.
- Material Considerations – MDF and plywood respond differently to heat over time; using the right substrate in vented areas prevents warping or finish damage.
- LED Lighting Heat – Even energy-efficient LEDs generate some warmth; avoid trapping them in tight, enclosed channels.
Pro Insight: At Glenlake Studio, we often route small ventilation channels into the cabinet’s top and bottom panels, making them virtually invisible from the front while keeping air moving.
Depth: Balancing Proportion and Performance
Depth is where design meets physics — and it can make or break your media wall:
- TV Mount Clearance – A flush, built-in look may require recessing the mount into the wall framing.
- Component Storage – AV receivers, amplifiers, and game consoles can be surprisingly deep (15–20 inches), so plan cabinets accordingly.
- Aesthetic Proportion – Too shallow, and the wall feels flimsy; too deep, and it overpowers the room.
- Future-Proofing – TVs and sound systems are evolving quickly. A little extra depth today can save you from a major remodel tomorrow.
Design Tip: We often aim for a visual depth of 12–18 inches but adjust internally to accommodate components — a trick that keeps the proportions sleek.
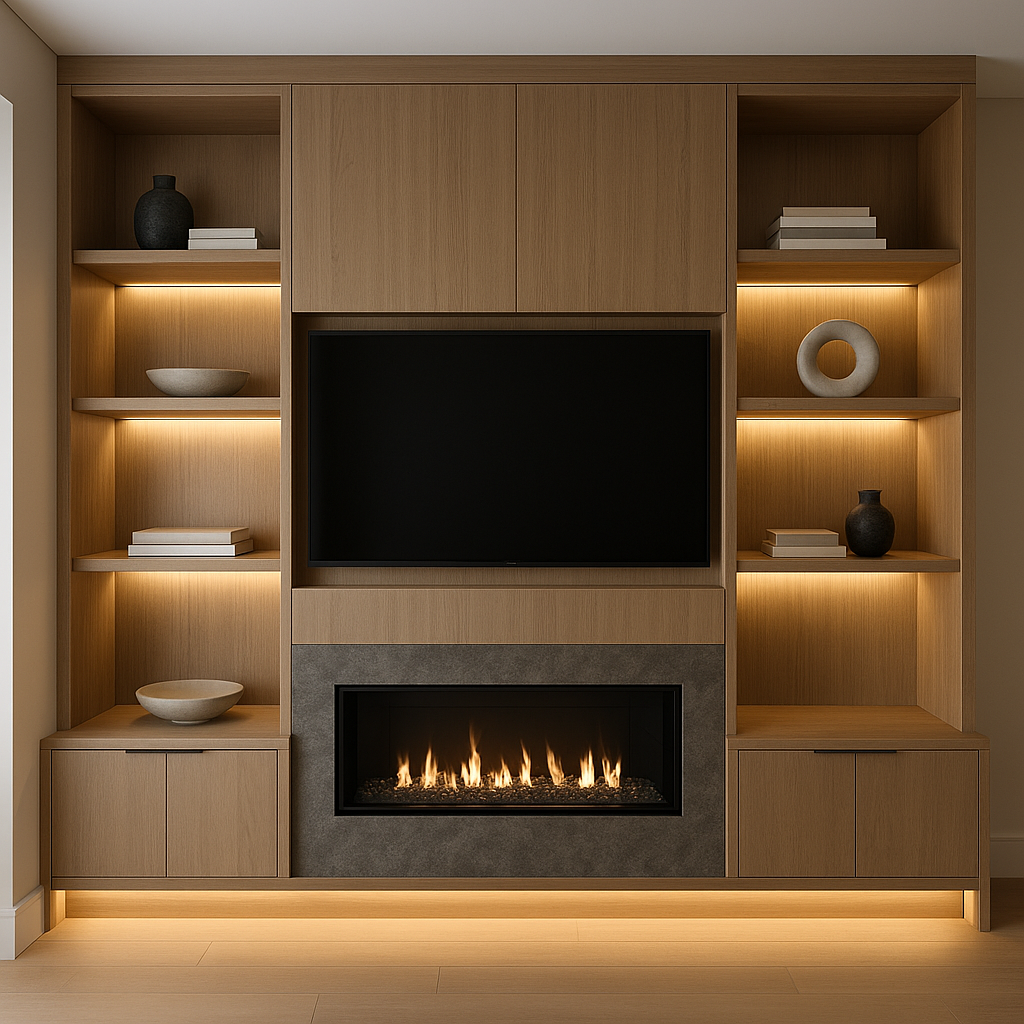
Dallas–Fort Worth Design Trends
In upscale DFW neighborhoods like Highland Park, Frisco, and Southlake, custom media walls are leaning toward:
- Integrated Fireplace + TV Combos
- Stone or Slab-Front Surrounds with concealed storage below
- Floating Cabinetry with LED underlighting
- Frameless Cabinet Doors for a clean, Euro-inspired aesthetic
These trends pair perfectly with Glenlake Studio’s craftsmanship, where we combine modern millwork precision with a deep understanding of AV needs.
Why Hire a Specialist
A great media wall is a permanent architectural feature — it’s not a piece you swap out like furniture. Choosing a partner who understands cabinetry, AV integration, and architectural framing ensures you get:
- Hidden wiring and perfect panel alignment
- Adequate ventilation without visible grilles
- Proportions that match your room’s architecture
- Materials and finishes that last
Our process at Glenlake Studio starts with CAD renderings and on-site measurements, followed by precise shop fabrication and white-glove installation. Book a consultation.
Final Thought
A custom media wall is the crown jewel of your living space. But the beauty is only half the story — the real magic is in the planning. Done right, your media wall will deliver flawless performance and timeless design for years to come.